How to remove a snap ring without pliers depends on whether the ring is accessible, undamaged and fully controllable. A non-marring pick may lift an exposed edge or lug in a light-duty situation, but dedicated snap-ring pliers remain the better choice for loaded, seized, corroded or repeated-service assemblies.
The aim is to remove the ring without marking the shaft, bore, groove or retained part. If the ring cannot be controlled at every stage, stop rather than turning a small maintenance task into a damaged assembly.
| Condition | Proceed only if | Stop when |
|---|---|---|
| Accessible ring lug or edge | The ring can be supported and lifted without scraping the groove | The tool slips or the ring begins to twist |
| External ring on a shaft | The release direction is visible and controlled | The ring is loaded against a shoulder or retained part |
| Internal ring in a bore | The bore opening and full ring path are visible | The ring is too deep, seized or partially hidden |
| Corroded or deformed ring | Engineering or maintenance procedure permits the chosen method | The ring cracks, fragments or no longer holds its shape |
Wear the site’s required protective equipment and control the work area according to your maintenance procedure. Keep hands and finished surfaces out of the likely release path. Do not treat a generic online method as a replacement for the plant’s lockout, guarding or service rules.
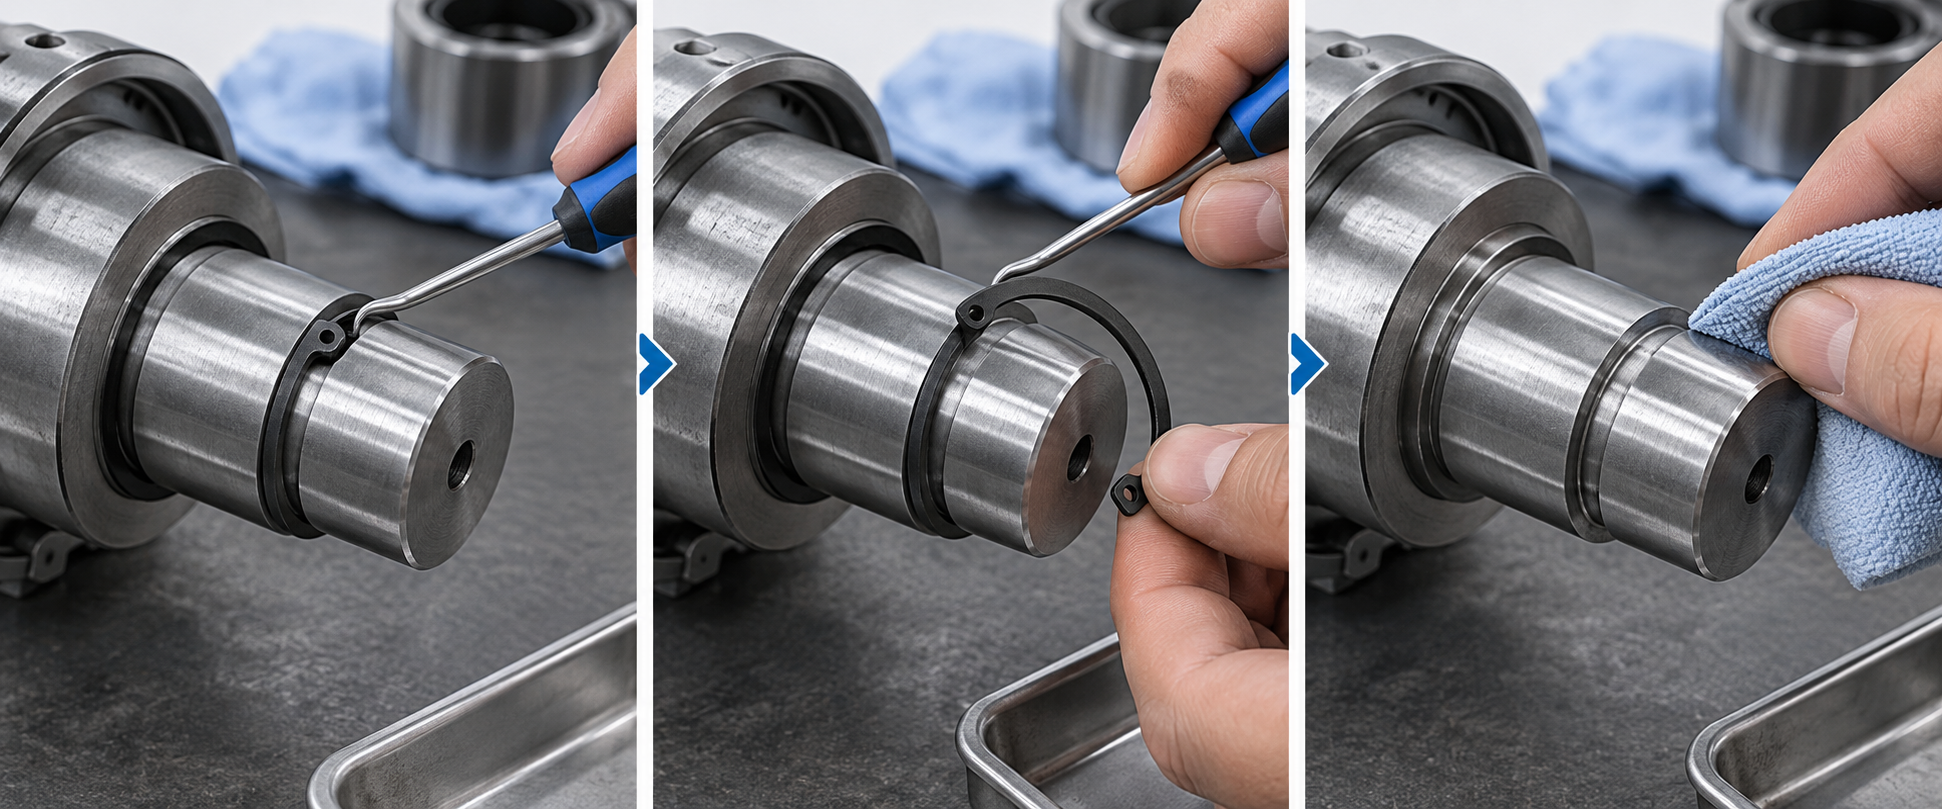
When the ring has an exposed lug or edge, the assembly is unloaded and the groove is visible, a non-marring pick can sometimes lift one end of the ring. Keep the pick shallow and use the groove direction as the guide. A second tool or a protected finger position may be needed to keep the lifted section from snapping back.
Do not lever against a precision shaft or finished bore if the contact can create a mark. Do not drive the tip under a hidden section of ring. The method is only workable when the ring’s movement can be seen and controlled as it leaves the groove.
Once one end is lifted, guide the ring around its circumference while keeping the released section supported. Avoid bending the ring farther than necessary. For an external ring, work around the shaft groove; for an internal ring, work around the bore opening and keep the ring from gouging the housing.
If the ring is under axial or radial load, the release may be unpredictable. Relieve the assembly condition only through the approved maintenance procedure. If the retained part cannot be supported or the groove is obstructed, use the correct pliers or escalate the job.
A ring that has been bent during removal should not be assumed fit for reuse. Inspect the ring and groove after removal, and replace the ring when its shape, surface or engagement is no longer within the released requirement.
If the removal reveals a damaged ring, record its location and visible geometry before disposal. Note internal or external position, standard or drawing reference, nominal size, material, surface finish, quantity and application. A clear photo and the shaft or bore condition can reduce follow-up during sourcing.
TG Eugene’s product families can be checked against the ring standard and size. For a drawing-based or finish-specific request, include the original part information in the technical inquiry.
No. A screwdriver can slip or mark the shaft, bore or groove. A controlled non-marring pick may be suitable for an accessible, unloaded ring, but the method must stop when the ring cannot be positively controlled.
Only if the approved application procedure allows it and the ring remains within its released condition. A visibly bent, cracked, corroded or permanently opened ring should be replaced or reviewed.
Use the dedicated plier type specified for the ring and access condition. Repeated production removal should not depend on an improvised method that creates variable force or inspection quality.