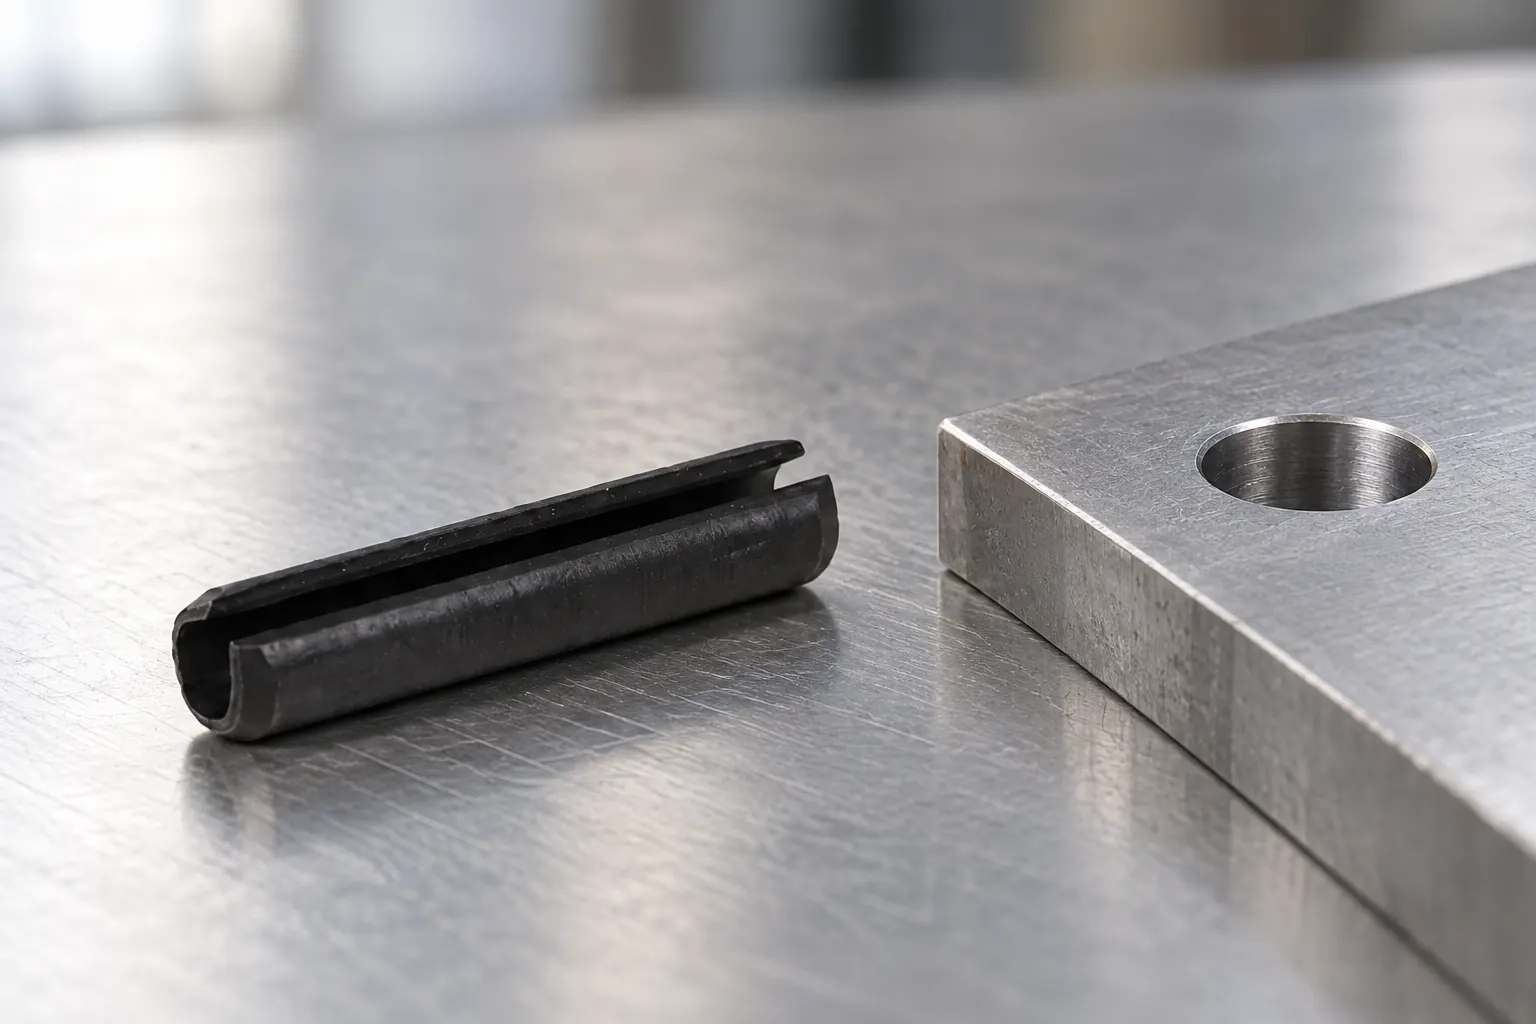
If you need to know how to remove a roll pin without damaging the hole, first identify the pin and confirm how the bore is accessed. A supported through-hole can usually be driven with a properly sized roll pin punch. A blind hole needs a different plan because the punch cannot pass through and the pin may be difficult to grip. The tool, support and access condition matter more than force.
A “roll pin” may refer to a slotted spring pin, a coiled spring pin or another hollow spring fastener. Do not assume that every pin has the same wall, slot or removal behavior. If the replacement will be a slotted spring pin, the ISO 8752 slotted spring pin product route is a useful starting point, but the drawing and application still control the final choice.
Start with the assembly, not the punch. Check whether the pin passes through the complete joint, ends in a blind hole, or has a shoulder or obstruction on either side. Clean the exposed end so the punch can sit squarely. If the pin is damaged, corroded or mushroomed, plan for replacement instead of trying to preserve it at any cost.
Prepare a stable support for the workpiece. The support should carry the area around the hole while leaving a clear path for the pin to exit. Do not rest a thin bracket on an unsupported edge and then apply repeated hammer blows. Bending the part or opening the hole can create a larger repair than the original pin.
For most through-hole work, the basic tools are a suitable roll pin punch, a small hammer and a support block. A roll pin punch has a small centering tip that helps it stay in the hollow pin. Its working diameter still needs to match the pin and the access available. A generic pointed punch can flare or split the pin instead of driving it cleanly.
Keep the roll pin installation record with the removal record when the joint is going back into service. The original insertion direction, hole condition and host material can explain why a pin is tight and can prevent a replacement from being installed with the same problem.
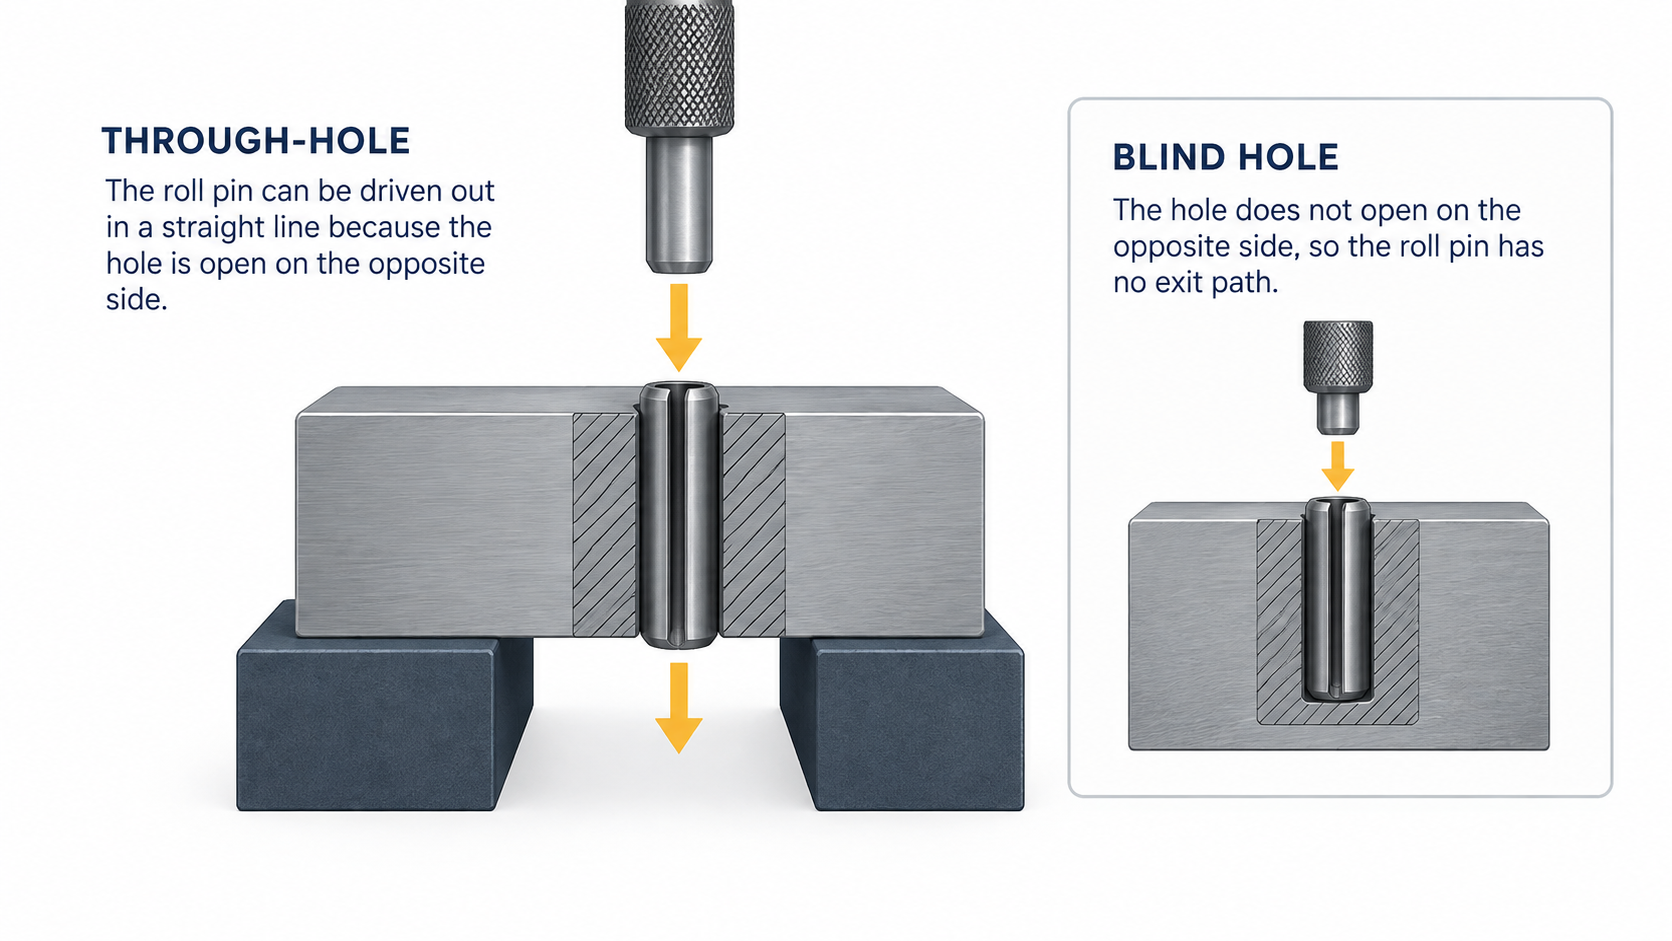
The key control is alignment. A square-ended punch transfers the blow along the pin axis. A ball-end or sharply pointed punch can skate, peen the pin end or concentrate force on one side of the hole. If the pin does not move after several controlled attempts, stop and investigate corrosion, interference, a hidden shoulder or a damaged pin rather than escalating force.
Blind-hole removal is not simply the same process with a longer punch. The pin has no exit path, and the bottom of the bore limits how far a tool can travel. First determine whether the pin is proud enough to grip. If it is, a suitable gripping method may work, but pulling at an angle can damage the bore or the surrounding component.
If the pin is flush or below the surface, the next method depends on the value of the part and the required hole condition. Careful drilling can remove the pin, but the drill must be centered and controlled so it does not enlarge the receiving hole. For a high-value component or a tight hole requirement, plunge EDM may be safer than drilling. These are machining decisions, not universal instructions; use the method that protects the part and can be inspected afterward.
Do not drive a blind-hole pin deeper unless the drawing explicitly provides clearance and the pin can be recovered. A deeper pin can block a passage, damage a bottom face or make later service more difficult. If the pin is corroded in place, document the condition before choosing a removal method.
Removal is complete only after the joint has been inspected. Check the hole for raised edges, scoring, burrs, corrosion and material pulled from the wall. Check the pin for bending, peening, cracks, deep scratches and loss of spring action. A pin that looks usable may no longer provide the same fit after it has been driven out.
For that reason, do not treat reuse as the default. A spring pin may be serviceable after a controlled removal, but the decision depends on the pin type, the original installation, the amount of deformation and the importance of the joint. Replace the pin when its shape or spring action has changed, when the hole was damaged, or when the assembly is safety-critical and the drawing calls for a new fastener.
If the joint is being rebuilt, confirm the replacement against the hole rather than ordering by the old name alone. Nominal diameter, free diameter, length, chamfer and receiving-hole condition are separate controls. The existing roll pin size and hole-fit guide can help organize those inputs before the new pin is specified.
Sometimes, but not automatically. Reuse requires a controlled removal and an inspection showing that the pin has not been peened, bent, cracked or stripped of useful spring action. Replace it when the joint is critical, the pin is visibly damaged, or the drawing requires a new fastener.
A blind hole has no exit path, so a standard through-punch sequence may not work. If the pin is proud, it may be gripped; if it is flush, careful drilling or EDM may be considered. Choose the method against the value of the part, the required hole condition and the available inspection process.